Creating a Built-In Banquette or Bench Seating for a Kitchen Breakfast Nook
/My Favorite Kitchen Renovation: Built-In Bench Seating
One of the best features of our renovated kitchen (you can see the full tour here and here) is the built-in banquette or bench seating. Not only does it make full use of our space, but I love how seamless and intentional it makes the whole room feel.
Before the renovation, we had a very tiny table and high chair in the eat-in breakfast space. I loved having this eating space right in the kitchen, but wished the kitchen itself could be a bit larger to make more room around the dishwasher for functionality.
Though pushing out the peninsula into the breakfast space wasn't possible with a table and chairs, it WAS possible with bench seating. Once scooting chairs in and out was no longer a thing, we could devote more room to the kitchen and still seat as many (if not more) people in the breakfast nook.
Besides helping us create the ideal kitchen footprint, the built-ins just look plain cool. I never saw myself as someone with built-in kitchen benches, but man, I like who I am with them...a lot.
Note that all "after" photos were captured by Abbey Wells of You Are Photo Co.
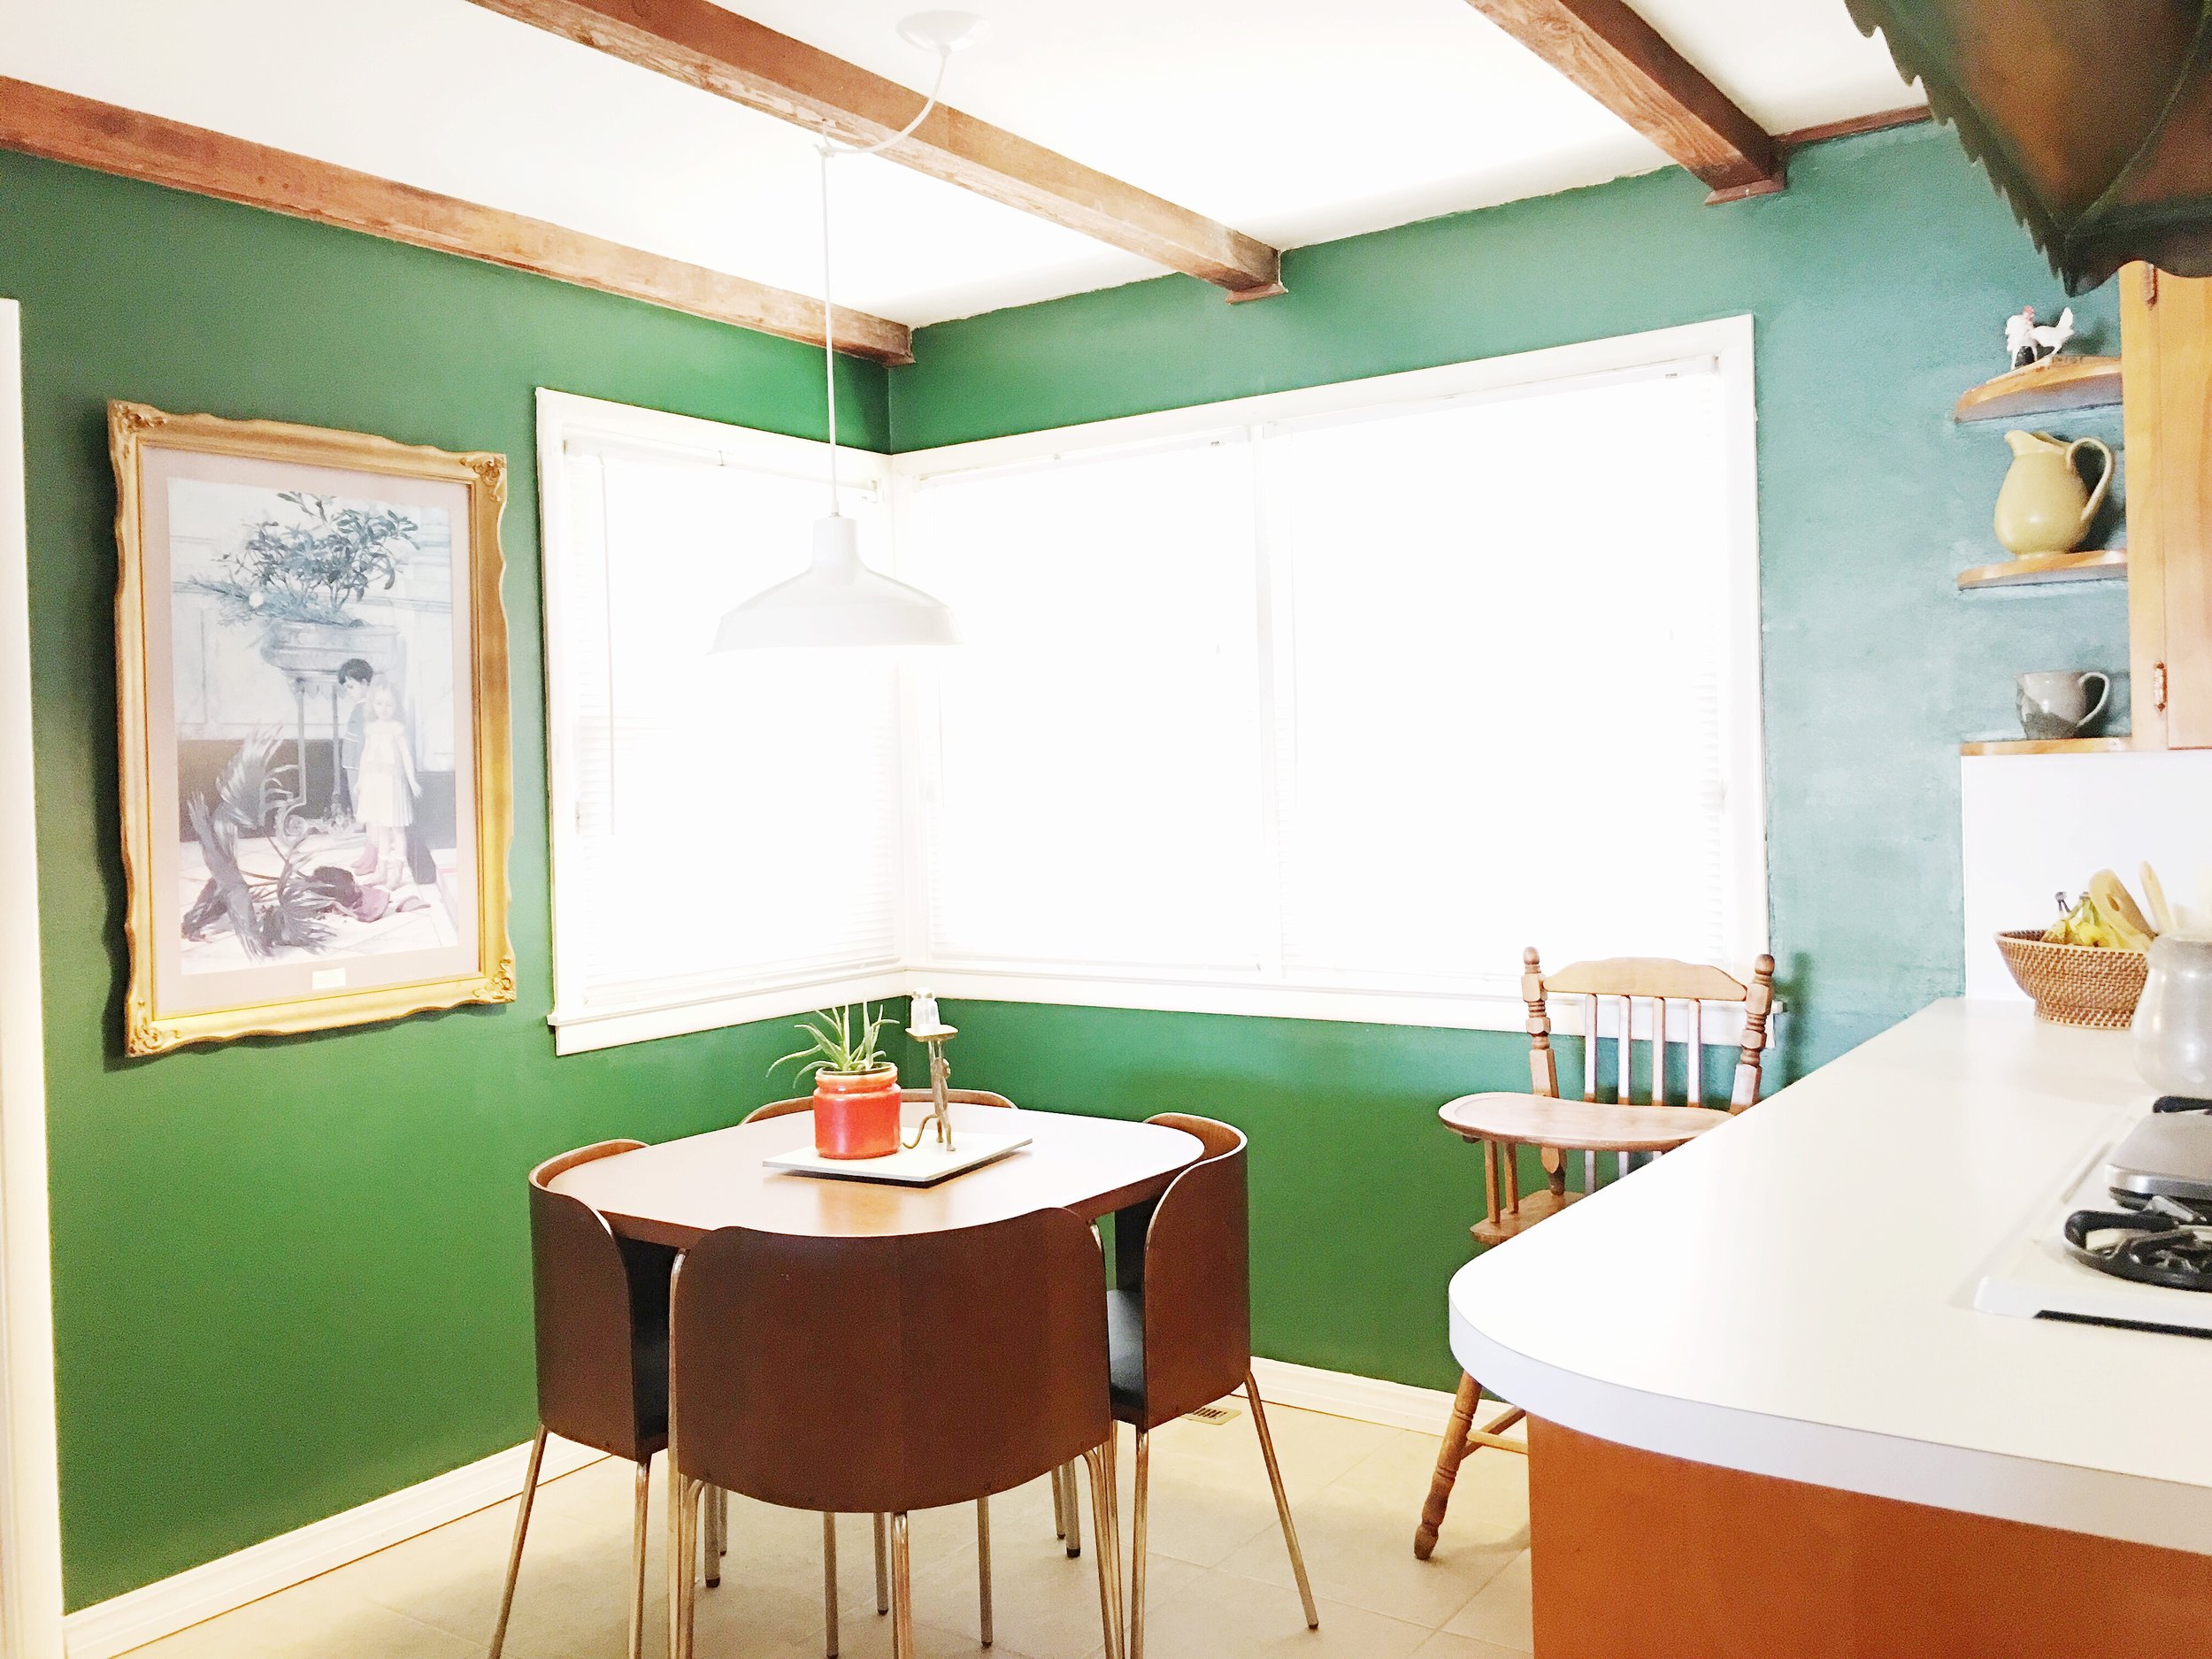
Before: Our small, simple set-up in our breakfast nook worked well for us, but we didn't realize the possibilities of what could be...
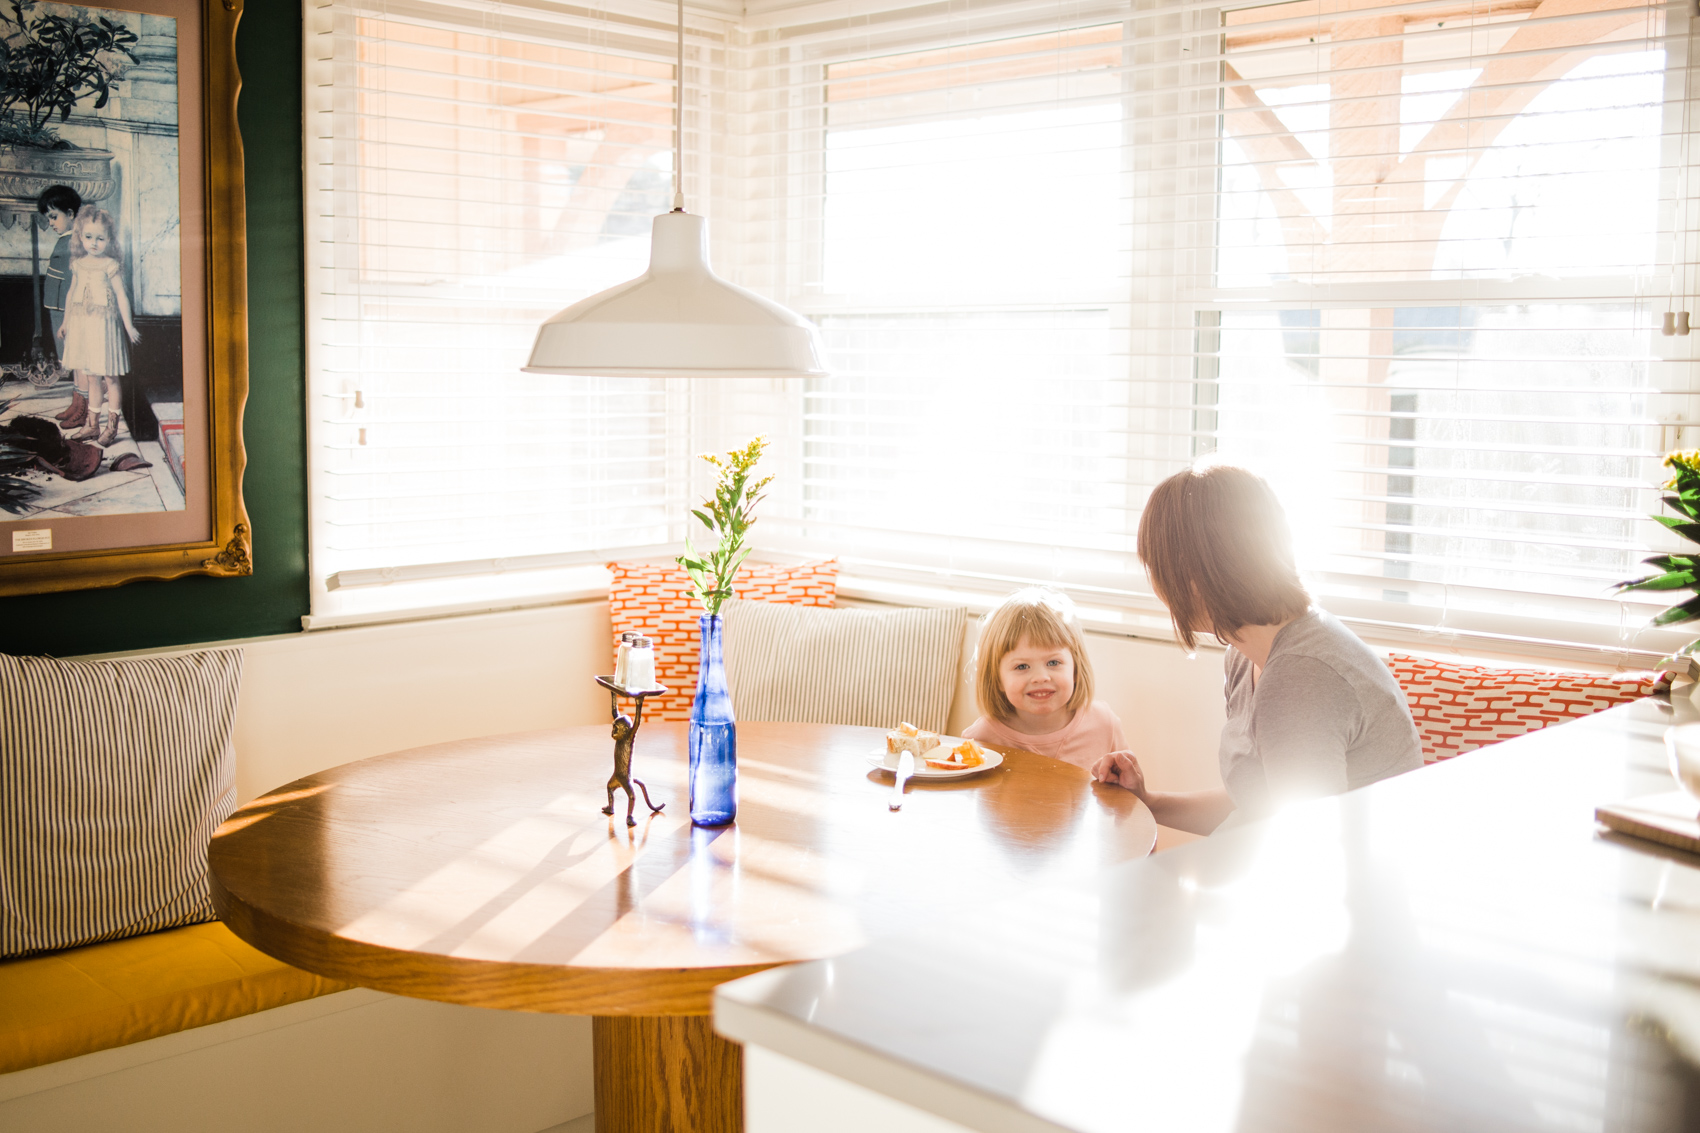
After: The banquette actually takes up less space, but looks so much bigger! Also, there is still enough space for the high chair to fit around the table too.
Before: The tiny dining set was centered in the small space.
After: The banquette efficiently uses every square foot of the nook AND can seat more than the tiny table. Plus, I love how we are nestled in between two big windows.
Making Cushions for Built-In Bench Seating
When it came time for cushions, I knew exactly who I wanted to make them. My mom. She's the best. I seriously recommend everyone recruiting a member of your family to be an upholsterer. You can tell them it's hard, detailed work, but they'll love it! Then after you talk them into it, you can use them for all of your upholstery projects. Love you, Mom! (Or you can use our upholstery repair department!)
I debated for a long time over the type of fabric to use. At first I thought just a regular upholstery fabric would do, but then I saw Caroline eat spaghetti for dinner on the bench and was horrified. I knew regular upholstery would be ruined immediately. My mind then went to vinyl. I didn't want to do it. Just thinking about sliding across a hot sticky booth at a restaurant gave me pause, but I really couldn't get that spaghetti mess out of my mind and knew I needed something easy to keep clean.
The cute spaghetti monster in the flesh.
I posed this fabric question to my aunt-in-law Laurie who is a self proclaimed fabric snob (and interior designer) and she immediately told me to go with outdoor Sunbrella fabric. She told me to basically make them like outdoor cushions so you could literally hose them off if needed. Done and done.
I'm happy to report that I have washed the cushion covers and all stains came out and it was not difficult to get them back onto the cushions. However (and I can't believe I'm admitting this on a public form), we did discover a small cocoon in the cushion zipper when preparing to wash them. This greatly disturbed me. I guess a tiny caterpillar made her way in through the screened window and decided my cushion zipper was the ideal location for her transformation? Gross.
Moving on. We used velcro to attach the cushions to the back of the benches. Laurie recommended attaching to the back of the benches as opposed to the bottom of the benches because the cushions were more likely to go catty-whompus the other way. The back-to-back attachment gives you a secure, clean hold while preventing unwanted twisting and pulling.
Word to the wise, remember to take your table height into consideration when choosing your foam height. You want to ensure you have good leg clearance while still having plenty of bottom padding.
Tips for Living with Built-In Bench Seating
Based on our year+ of living with built-in seating, here are a few tips:
1. Add an extra chair if possible. It is nice to have an extra chair for those guests or family members who aren't as comfortable sitting on the bench. We are lucky to have a wide enough walk-way so that a chair easily fits across from the bench seating.
2. Be wise with your table selection. I'd recommend a pedestal table, not a four legged table. This recommendation seems obvious to me now, but was not something I immediately knew while shopping for a table. Also, the fact that our table is super heavy seems to be a perk because I'm never worried about it tipping over when someone pushes on it to help scoot into the corner. So consider a solid, heavy table.
3. Hang your light fixture last. Don't make the mistake of guestimating where your light should hang based on a theoretical table size. Just wait for your table, then hang your light. Though I ended up loving the look of the ceiling medallion, we only added it because I made this very mistake and decided that installing a medallion was easier than repairing ceiling holes. You live, you learn.
Obviously, I am a clear supporter of built-in kitchen seating. If this set-up may be the perfect solution to the small nook in your home, I whole-heartedly say, go for it! Just check your cushion zippers every now and then.
We offer collaborative interior design. We want to work with you to make your home match your heart.


